Umbrella

Umbrella
Powerscourt, Ireland.
Showing posts with label Quilt. Show all posts

Tuesday, October 30, 2012

Cooper's I-Spy Quilt~Blogger's Quilt Festival

Cooper's I-Spy Quilt!

 This is the second I-Spy quilt I have made using Carolyn from Obsessively Stitching's tutorial on an I-SPY Disappearing 9 patch quilt.  I used the quilt as you go method and I have to say it was exceptionally easy!

Cooper is my sweet nephew who turned 2 this summer.  I had been meaning to make this quilt for him for quite some time, so his birthday simply hastened the process. Actually I was in a bit too much of a hurry, and forgot to attach the boarder on one side...oops.  You really can't tell unless you look for it.

9 Patch cut into 4 patches

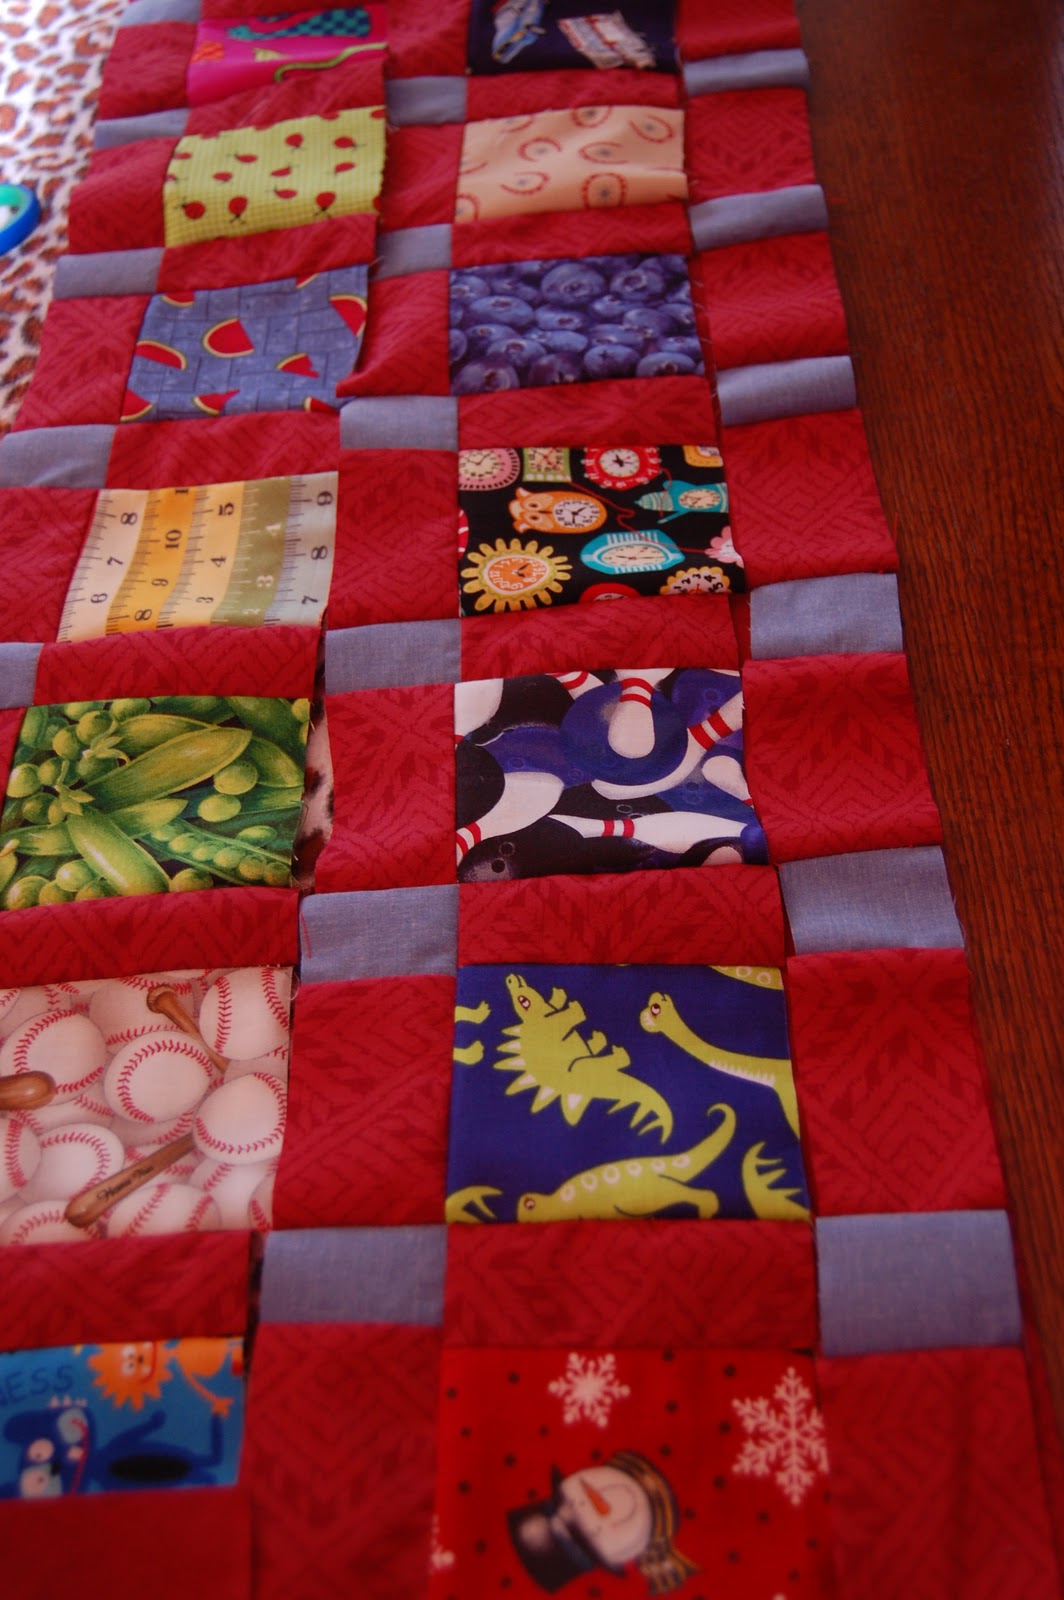
I started by making the 9 patch with the setting square in the center and I-Spy squares on the corners.  I then cut the 9 patch into 4 equal pieces and attached the squares into rows.  Next the rows were attached to the flannel backing and quilt center in the quilt as you go method.

My sweet Hello Kitty Sewing machine in the background!
 I finished by doing a self binding, folding the flannel backing over.  It is a bit thicker than I like, but still did the trick!


Looks great on Max's bed!
Max making his first pillow!

Max wanted to get in on the action, but most of my sewing was already done.  We sewed a quick pillow and I gave him "credit" for helping with Cooper's Quilt!

All folded up and ready for the birthday boy!


This is the second in my series of Cousin Quilts.  When I was a young girl, my grandmother, Dorsey, made me a denim shirt and embroidered flowers, birds and strawberries on it...exquisite work. My grandmother was an amazing woman and so talented in so many different areas.  She was an expert seamstress as well as very talented at hand embroidery.  She could garden and cook....really she could do anything she put her mind to.

When I still lived at home with my parents, I remember cleaning out my closet and coming across the 'fancyshirt' Dorsey had lovingly made for me.  Because I was young, I was going to to give it away.  My mother, another wise woman, took it and put it away in her closet.  Many, many years later, I came across it on a visit to my parent's house.  I asked my mom if she would mind if I took it back.  You see, I had just started sewing and when I saw the blouse I formulated a plan.  I saw a keepsake that I could share with the rest of Dorsey's grandchildren.

My grandmother had seven grandchildren and five of us have children.  Although my grandmother, Dorsey,  lived long enough to meet only one of her great-grandchildren, I want all of them to have a part of her, as well as pass down her love of sewing through me and my work.  Cooper's Quilt has the white embroidered birds from the fancyshirt...and a part of Dorsey.
Happy Birthday, Cooper!!


Amy's Creative Side
Quilt Festival

Blogger’s Quilt Festival Stats
Finished quilt measures : 44" x 60"
Special techniques used : quilt as you go, disappearing 9 patch, I-Spy
Quilted by:  Me...on a 3/4 size Hello Kitty Sewing machine!
Best Category : Baby Quilt, Scrap Quilt, Throw Quilt

Monday, April 23, 2012

Globe Quilt~A Generational Experience

I've only been sewing about a year, so I'm really not that good yet.  This quilt, however was a lot of fun to make and not too difficult for me.  It also has a story.

When I was a young girl, my grandmother, Dorsey, made me a denim shirt and embroidered flowers, birds and strawberries on it...exquisite work. My grandmother was an amazing woman and so talented in so many different areas.  She was an expert seamstress as well as very talented at hand embroidery.  She could garden and cook....really she could do anything she put her mind to.

When I still lived at home with my parents, I remember cleaning out my closet and coming across the 'fancyshirt' Dorsey had lovingly made for me.  Because I was young, I was going to to give it away.  My mother, another wise woman, took it and put it away in her closet.  Many, many years later, I came across it on a visit to my parent's house.  I asked my mom if she would mind if I took it back.  You see, I had just started sewing and when I saw the blouse I formulated a plan.  I saw a keepsake that I could share with the rest of Dorsey's grandchildren.

My grandmother had seven grandchildren and five of us have children.  Although my grandmother, Dorsey,  lived long enough to meet only one of her great-grandchildren, I want all of them to have a part of her, as well as pass down her love of sewing through me and my work.

My sweet cousin, Crockett is 9 years old and this week he lost his daddy.  It really breaks my heart.  It also makes me realize that if I really want to embark on this journey of leaving a part of Dorsey with the next generation, I need to start now.  Also, when I get bad news, I like to DO something...so I started sewing.  Here is my journey.


I started with Dorsey's shirt, a world map fabric panel, some boy-themed 'I-Spy' squares, flannel fabric for the quilt back, fabric for the binding.  Supplies used are as pictured.


After I added a flag and I-Spy boarder, I cut some batting and the blue flannel fabric a bit larger than the quilt top.  I then made the 'quilt sandwich' and held it in place using about 20 safety pins.


After I quilted the top following the latitude and longitude lines, I trimmed the quilt (no picture...sorry) and sewed on the binding.  That's me and my 'Hello Kitty' 3/4 size sewing machine.  Having a simple, no frills machine really makes sewing much easier and enjoyable.


So now the fancyshirt has a new life as part of a quilt!  Crockett gets a small strawberry embroidered by Dorsey on a quilt made by his Cousin Marti.  It's a family quilt made by two different generations.

 
Here's the finished project, ready to be boxed up and sent to my sweet cousin!
Hope you enjoyed the journey and look for more of these 'Cousin Quilts' in the future!

Cheers~
Marti in San Diego

Sunday, October 30, 2011

Bloggers Quilt Festival

I-Spy Quilt (Disappearing 9 Patch)


This is the first quilt I ever made.  Actually, it's one of the first things I ever made.  I started sewing not quite a year ago.  My son, Max has pretty short legs, so I bought a sewing machine so I could hem his ridiculously long pants.  So last year around Thanksgiving, I started on this journey.  You see, I really didn't even know how to sew.


By January I thought I was ready to try a quilt.  It actually came out quite well.  It's ironic that such an old fashioned art, like quilting and sewing, could be taught through modern methods.  I watched clip after clip on youtube and read blog after blog on tutorials.  One of my favorite teachers was Jenny at MISSOURI STAR QUILT COMPANY.  Another was Care at OBSESSIVELY STITCHING.  I learned how to thread the machine, sew and then quilt.  There is so much information out there that it made sewing...and making this quilt easy!


I didn't even know enough to buy actual quilting materials.  The quilt back and red sashing is an old red sheet.  The small blue setting squares and boarder are another old chambray sheet.  You can see from this picture that the "batting" I used is actually an old leopard print blanket.  The I-Spy squares mostly came from an I-Spy swap.  That's another great tradition that has gone modern through the internet!  You buy 10 I-Spy fabrics, mail 10 4" squares of each to your host and....Voila!  You have 100 different I-Spy squares to choose from!


I used a TUTORIAL from Care at Obsessively Stitching for a Disappearing 9 Patch Quilt: I-Spy Version.  I used ANOTHER TUTORIAL from Jenny at Missouri Star for the quilt as you go method.  The combination of both of these made my first quilt quick and easy.  Cutting out took a about an hour one day...the subsequent cutting, sewing and putting together took about another 5 hours on another day.  Instead of binding, I just folded the back over and sewed it on. 

I have many more plans for I-Spy quilts just like this one!  I have cut out another boy and 2 girl and versions and just need to put them together.  I'm not sure that using the quilt as you go method is actually easier.  I've made 4 other quilts and I'm still trying to decide.which way works best.  I will say that the disappearing 9 patch method does give you the most bang for your buck!


So here is the finished product and a sleeping kiddo.  I hope you enjoyed my journey from novice to quilter.

Cheers~
Marti

Tuesday, August 9, 2011

Coin Quilt

Back in April, I began a project that I had initially thought of as a Mother's Day present for my mom.  She loves French fabrics and I came across the Moda line called "A Breath of Avignon."  I saw a few versions of a coin quilt and found a tutorial from Moda that I adapted.


I used two a charm packs and some yardage of the red floral fabric for the boarder from the Moda line.  I sashed in a chambray quilting fabric and backed it in a red quilters cotton.  I used the quilt as you go method I learned from a tutorial from Jenny at the Missouri Star Quilt Company.


I didn't bind the quilt in the traditional way.  I used another short cut and rolled the backing over.  I'm fairly happy with the way this came out.  Next time, I'll do a few things differently.  Every time I start sewing, I ask myself why I don't sew more often.  I really enjoy the process and the immediate gratification that comes with completing a project.

I hope you enjoyed reading about my coin quilt that I meant to finish in May...so only three months late...lol!   If you need more info on the methods I used, click on the word "tutorial" in the body of the post.

Cheers~
Marti

Saturday, May 14, 2011

Flag Quilt

Max loves flags.  For as long as I remember, this has been a favorite item for Max.  When I bought my sewing machine in November 2010, I started sewing to fix Max's pants, so it came as a big surprise to me that in February I would be starting a flag quilt for my boy!


The inspiration for this quilt was, of course, Max!  The catalyst was a flag bandanna he received as a party favor at a Fourth of July party long past.

I started by making a red border out of a worn sheet around the bandanna.  I then added another in the red & white star fabric.   I had the red dot and white dot fabrics, but I was stumped!  This is the second quilt I ever started, but third I've finished.  My other projects had been based on step by step tutorials.  I made 4 inch squares of both the red with white dots and the white with red dots.  I kept thinking that the quilt needed something extra.  I tried several different blue and patriotic fabrics, but none looked right. 


Because Max has anxious to use it, I went ahead and finished with what I had.  I backed it in a bright red flannel and used cotton batting.

Max calls this his "Flanket" which I guess is a flag blanket. 


I tried my first ever applique on this project too...MAX!

I learned it's much easier to start with an end in mind, but I also learned that the journey of making the quilt...to see what it wanted to become...was also a rewarding experience.  The best is how much Max loves the flanket.  When I saw that Amy's Creative Side was hosting a Spring Blogger's Quilt Festival, I knew I needed to share this one! 

Click to see the other entries in the Bloggers Quilt Festival

Hope you enjoy!

Cheers~
Marti

Amy's Creative Side | Bloggers' Quilt Festival

Sunday, May 1, 2011

Streak of Sunshine Quilt

So this week, I wanted to try something  a little different.  I came across a quilting tutorial for a Streak of Sunshine quilt at Qulitville.  I really liked the idea of getting a finished product quickly, but I am sold on the quilt as you go method demonstrated by Jenny at the Missouri Star Quilt Company.  I will try my best to document my process and my efforts at combining the two.


Here is the almost finished product :-)


  • I selected my fabrics.  I chose pinks and tans as I have never made a "girly" quilt before.  I wanted a quilt a bit larger than the tutorial, so I made my strips a little larger. 
  • Here are 8 strips of fabric that are 5 inches to the width of the fabric, so about 44 inches long. 
  • I then sewed all of the strips together, rights sides together. 
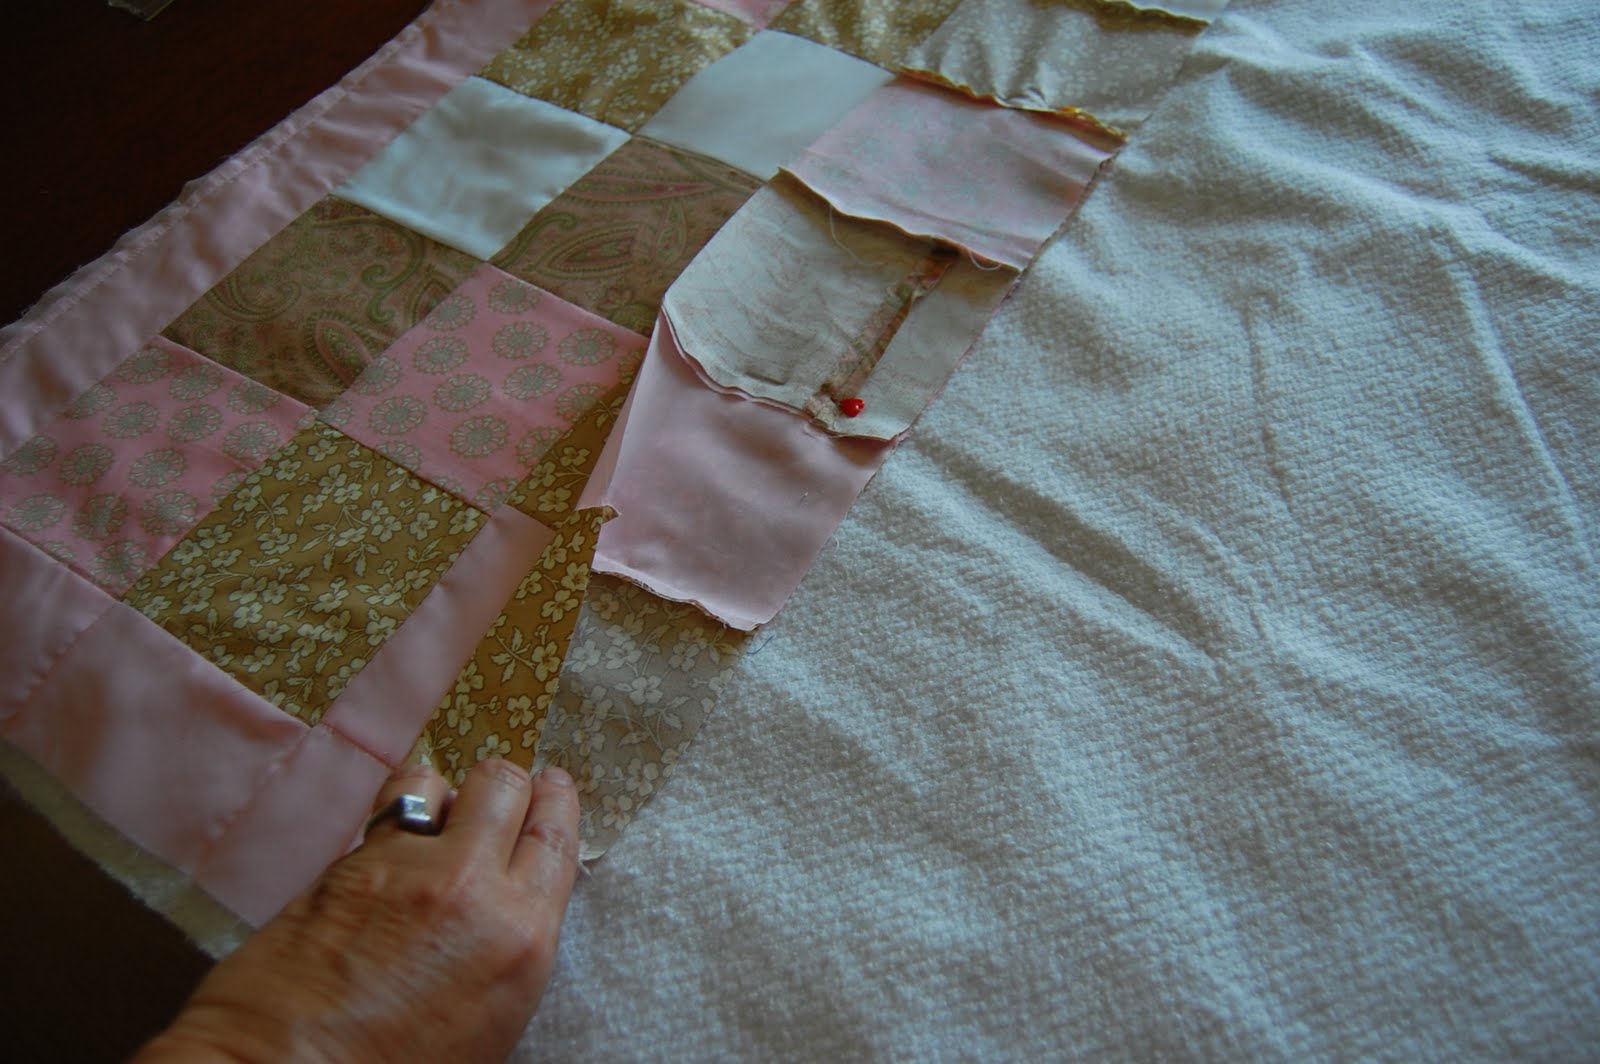
  • I sewed the first piece to the last piece, right sides together to make a tube (you can see a full demo on the Streak of Sunshine link in the intro).
  • Then I cut the tube into 5 inch strips giving me 9 strips with 8 squares each.
  • Since these were still in a tube, I took my seam ripper and removed one seam, each row one square over from the previous.


  • Now I laid out my squares with the darkest pink square in the top left hand corner "streaking" down to the bottom right hand corner.
  • I decided that I wanted a solid pink border, so I cut out a 3 inch border for all 4 sides. 
  • Here's where my real adaptations begin.  Since I'm using the quilt as you go method, I need each strip, including the borders, to be complete.  I needed to cut the 3 inch side borders into 5 inch pieces.
  • I attached a pink 3 inch by 5 inch piece to both sides of each strip. 
  • Now I'm ready to put this quilt together!!!


  • Start with you quilt back right side facing the table (or floor, where ever you lay out) then put your batting on top. 
  • Now you're ready for your first strip!

  • Sew your top border on the quilt right side facing up.

  • Now pin your first row of squares to the border, rights sides together and sew.

  • Press open and you have your first row of your quilt!
  • Continue to pin, sew and press until you are out of strips, ending with bottom border


  • And here is the almost finished product.  I just need to trim and add a binding.

This came together really quickly.  The strip piecing method is quick.  Add the the tube piecing and quilt as you go method and you make it super quick.  The entire process took a few hours!  I actually think it's taking me almost as long to write this post...haha!

If you're interested in either the quilt as you go method or streak of sunshine pattern-tutorial, the links are in the into section of this post.  As a beginning sewer and quilter, I am amazed that I can make almost an entire quilt in a few hours.  I think this can be used by someone at any level of sewing, beginner to expert!

I hope you enjoyed this and feel free to ask if you have any questions!

Cheers~
Marti

The Girl CreativeDittle Dattle

Saturday, April 16, 2011

Friday Night Sew In Stuff

Although from looking at my pictures, it doesn't seem like I got a lot accomplished, I actually did!


I cut and chain pieced about 200 pieces for a coin quilt I am making.  I'm using a tutorial from Moda bake shop, which actually looks quite easy.  I'm still fiddling with the sashing and border fabrics, but the bulk of the work is done, as shown in this pile.

My limiting factor last night was that I really didn't feel like dragging out the ironing board, so I stopped with the chain piecing.

I then moved on to a placemat project.  I had cut out the fabric last weekend for 4 placemats.  I tried one technique, that did not work the way I wanted it to.  Basically I'm trying to use left over fabric and old t-shirts as the inside batting.  When you sew woven cotton to knit (like t-shirt material) it stretches and puckers....bummer for me.


So I had to embark on a new course with the placemats.  I sewed together one side, quilted the front, t-shirt and back together, trimmed and then added seam binding.  It actually turned out cute.  I started the second placemat (top of photo) and quickly realized that I needed the iron, so I stopped for the night.

So, this is my first Friday Night Sew In.  I really like the idea of setting aside time to do something creative.  Although I just started sewing, I have a lot of projects that I need to work on. 

Cheers~
Marti


Handmade by Heidi

Friday, April 15, 2011