Umbrella

Umbrella
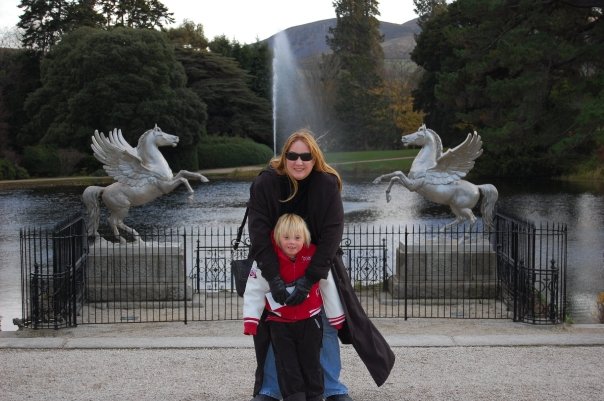
Powerscourt, Ireland.

Monday, March 11, 2013

Bye-Bye San Diego...We're Sad to See You Go


Max's last day at Cabrillo was March 1st.  One of many group hugs for Max and his pals.


Some of Max's pals posing for a pic with his teacher, Mrs. T in the background!
 
 
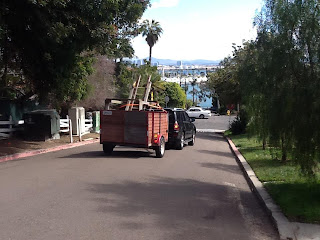
As we head down Owen Street for the last time with the San Diego Bay in sight, it is with sadness and excitement that we embark on our new adventures in the West Antelope Valley!
 
To keep up with us, see:


Tuesday, February 19, 2013

Endings Lead to New Beginnings....

We've been doing a lot of reflecting the past few weeks.  This is a time of endings and new beginnings.  I harvested the last of our carrots from the garden in San Diego...and bought seed potatoes for our new garden in Fairmont.

Max & Larry giving Carolyn & Greg the last rent check  
We got keys to our new place...Max does the honors!

We've been very happy in San Diego for the past 8 years, so it's really bitter sweet.  Our new place holds so much promise, that it makes our eminent departure a bit easier.

Yesterday Larry took Max's play structure apart and is taking it to the new house.  I think the more familiar things that Max has at our new house, the easier the transition will be for him.  The act of removing the structure has actually made things more real for some reason.

Max making a rainbow
I am so used to looking out the window and seeing this...now only the trampoline (far left outside the picture) is there.  Soon that too will come down and make its way to our new place.

The act of moving is overwhelming and exciting and cathartic.  I have been posting things in the FREE section of craigslist almost daily.  I love the win-win of getting rid of our excess stuff to someone that is genuinely thrilled to have it!  So far we have given away: a tent, outdoor furniture, wicker furniture, books, shipping pallets, a pallet of bricks, a gazebo, a weight bench with weights, gardening items, a weed whacker, and hundreds of shipping boxes....so far! 

We have had Am-Vets come to the house 5 times already and have given away so many clothes, dishes, books and toys!  The act of getting rid of things makes you feel lighter of heart. The other side of this is that we still have soooooo much stuff. 

So we're walking the thin line of excitement over our new place...making improvements and such...with the act of assessing, weeding out and boxing up our belongings for the move.

Stay tuned.....

Cheers~
Marti in San Diego

Thursday, January 3, 2013

Check Out My New Blog....


I started a new site to document our journey:  martisnewadventures.blogspot.com
Here is the first post.....
Our future house in the West Antelope Valley, CA

We're in escrow on this fabulous white house pictured above.....and everyone we know thinks we're nuts! 


View from our window in San Diego, CA
I need to take a few steps back for this all to make sense.  Currently we live in a fabulous house, on a quarter acre lot, with an amazing view, 5 minutes from downtown San Diego.  We have a giant picture window that looks over San Diego Bay to Coronado Island and to Mexico beyond.  We have a great yard with room for our trampoline & play structure with plenty of room for a large garden.  A small bay beach is right down the street.  Life is pretty good.

Max watering our yard, downtown San Diego in the back.

The main problem with our situation is that Larry, my husband, has been commuting to Kern County for the past few years.  Larry is a contractor whose role has morphed from mainly working from home to having to be on site with his customer....who happens to be 3-4 hours away.  In the past few years, he's gone from mostly being here with Max and me to traveling to a hotel in Bakersfield on Sunday...then driving to the oil fields an hour each way to work....returning exhausted on Thursday nights.  The separation simply isn't working for our family.

Max with his aide since KG, Alma, and pals Carlos & Caden.
The decision to move closer to Kern County wasn't an easy one.  We've been renting this amazing place for 8 years.  Our son, Max, has Down syndrome.  The services he receives at our neighborhood school are extraordinary.  Cabrillo is a small K-4 school with a few hundred kids...Max knows everyone and everyone knows Max.  He's in a regular class with the same kids he's been with since Kindergarten.  He has friends from school and connections made through the special needs community here in San Diego.  Like I said, life is good.

Max plays Miracle League baseball.
When you have a child with special needs, you're always looking towards the future.  Although life in San Diego is great, is it what's best for Max long term?  Although his school placement is ideal now, when he enters 5th grade, the situation will not be optimum.  What will Max do in High School and beyond?  When you start asking the BIG questions, your path leads in a different direction.

We need to set Max up for success long term.  We also need a better (hard to quantify better when you live in San Diego where we live) quality of life as a family.  The solution seemed to be moving towards Bakersfield.  The main problem with that is the air quality.  You simply do not move a medically fragile child to a place where he can't breathe the air.

So we spent a few months looking for someplace close enough for Larry to commute to work, but that had air you can breathe.  We looked in the Cuyama Valley, Lebec, Lockwood Valley,  Frazier Park and the West Antelope Valley.  Although they all had great attributes, the West Antelope Valley ended up being the best fit.

In the 'yard' with the Tehachapi Mountains in the background. 


We've looked at a lot of houses...some fabulous and some lacking.  We lost out on the house we thought was THE house, only to have the white house pictured at the top fall right into our plans.  Our plans to set Max up for the future...to have a nice place to live with enough acreage to grow some sort of 'low maintenance'  crop on the land. 

It looks like we found our solution.  Join us for future updates to our home, land, Max's life and our further adventures n the Antelope Valley!

Cheers~
Marti

Wednesday, December 12, 2012

Simple Holiday Decorating


This year I decided to do things a little differently.  Generally I drag out the same old decorations...THAT I LOVE...and put them in about the same places every year.

Since I wasn't ready to bust out my decorations, I purchased 2 poinsettia plants from Home Depot.  I then placed several red candles on the mantle for a simple Holiday look.

Next I purchased 2 white slip covers at overstock.com to begin the big  transformation.  They each cost $39 and I even had a coupon!  I figure I can use them again in the summer for a fresh and/or Patriotic theme, so money well spent.

Then I took off the tapestry pillow covers on my throw pillows and made new covers.  This was much easier than I thought.  I used a tutorial (see HERE) for a quilt block to make 2 of the package design.  I eyeballed a Christmas Tree block (triangle with a stump on the end) and made 2 of these using old clothing of Max's as the tree. 
Now the pillows remind me of when Max was little and wore those cute little shirts!

Since Max's birthday is December 8th, we generally wait to do our decorating until after his party.  Eventually, we'll put up our tree and bring out all of the old favorites. For now, this is a holiday look, without a lot of fuss and work.

Hope you enjoyed this post!

Cheers~
Marti in San Diego


Tuesday, October 30, 2012

Cooper's I-Spy Quilt~Blogger's Quilt Festival

Cooper's I-Spy Quilt!

 This is the second I-Spy quilt I have made using Carolyn from Obsessively Stitching's tutorial on an I-SPY Disappearing 9 patch quilt.  I used the quilt as you go method and I have to say it was exceptionally easy!

Cooper is my sweet nephew who turned 2 this summer.  I had been meaning to make this quilt for him for quite some time, so his birthday simply hastened the process. Actually I was in a bit too much of a hurry, and forgot to attach the boarder on one side...oops.  You really can't tell unless you look for it.

9 Patch cut into 4 patches

I started by making the 9 patch with the setting square in the center and I-Spy squares on the corners.  I then cut the 9 patch into 4 equal pieces and attached the squares into rows.  Next the rows were attached to the flannel backing and quilt center in the quilt as you go method.

My sweet Hello Kitty Sewing machine in the background!
 I finished by doing a self binding, folding the flannel backing over.  It is a bit thicker than I like, but still did the trick!


Looks great on Max's bed!
Max making his first pillow!

Max wanted to get in on the action, but most of my sewing was already done.  We sewed a quick pillow and I gave him "credit" for helping with Cooper's Quilt!

All folded up and ready for the birthday boy!


This is the second in my series of Cousin Quilts.  When I was a young girl, my grandmother, Dorsey, made me a denim shirt and embroidered flowers, birds and strawberries on it...exquisite work. My grandmother was an amazing woman and so talented in so many different areas.  She was an expert seamstress as well as very talented at hand embroidery.  She could garden and cook....really she could do anything she put her mind to.

When I still lived at home with my parents, I remember cleaning out my closet and coming across the 'fancyshirt' Dorsey had lovingly made for me.  Because I was young, I was going to to give it away.  My mother, another wise woman, took it and put it away in her closet.  Many, many years later, I came across it on a visit to my parent's house.  I asked my mom if she would mind if I took it back.  You see, I had just started sewing and when I saw the blouse I formulated a plan.  I saw a keepsake that I could share with the rest of Dorsey's grandchildren.

My grandmother had seven grandchildren and five of us have children.  Although my grandmother, Dorsey,  lived long enough to meet only one of her great-grandchildren, I want all of them to have a part of her, as well as pass down her love of sewing through me and my work.  Cooper's Quilt has the white embroidered birds from the fancyshirt...and a part of Dorsey.
Happy Birthday, Cooper!!


Amy's Creative Side
Quilt Festival

Blogger’s Quilt Festival Stats
Finished quilt measures : 44" x 60"
Special techniques used : quilt as you go, disappearing 9 patch, I-Spy
Quilted by:  Me...on a 3/4 size Hello Kitty Sewing machine!
Best Category : Baby Quilt, Scrap Quilt, Throw Quilt

Sunday, June 24, 2012

Raised Beds From Repurposed Shipping Pallets


 Building a RRR (Reduce~Reuse~Recycle) Garden at Cabrillo Elementary
 
Caleb watering the RRR Garden.
My son, Max is a First Grader at Cabrillo Elementary School in San Diego, California. I help out in the classroom quite a bit and I was shocked at how far removed our kids are from the food chain.  This got me thinking.  The first graders should have a first person, hands on experience with their food...and what better way than to start a garden.  The largest issue was that starting a garden is expensive.  Materials, soil, plants and seeds can add up.  Where there is a will, there is a way.


I had been looking on youtube and came across several variations of using a shipping pallet to build a raised bed.  None of the videos were exactly what I was looking for, but they were definitely the catalyst for the project.  I checked on the "Free" section of craigslist and found that a neighbor was doing some landscape work and had pallets to spare.  

I was after a simple method.  My initial thought was to use 2 pallets per bed.  I figured we could just cut the first pallet in half and the second pallet in quarters.  The only issue with this was that I needed my husband's tools (& help) so with that came his vision of the project.  He is more of a perfectionist where I am more of a 'quick and easy as long as it works' type, so we actually did both methods!

Larry assembling the "pretty" version of the boxes.
Larry's idea was to take the pallets apart and reassemble them into the planter boxes.  This method produced much more attractive planter boxes, but it was a pain in the neck.  We used a nail pry bar to loosen the boards and then took them apart.  We removed all of the nails, since they would be used by kids and reassembled the boards with an impact driver (like a drill & screwdriver combo) into a finished box.

Small box made of left over short boards.
The other added advantage to Larry's method is that the boards are close together so the soil will stay in the boxes without additional steps.  For another class of older kids, we made the box Larry is working on (above) that was square, about 42 inches on each side.  For the First Graders, we made them about 42 inches by 21 inches or a half pallet by a quarter pallet.  We did this because we wanted the kids to be able to reach into the boxes.


Two of the finished boxes.
My method was to cut the pallet in half (Larry used a sawzall to cut through the board and nails) and used the short scraps (like 1/4 pallet size) to form the sides using the impact driver and screws.  Although this was much faster, the main drawback  was that there are gaps between the boards of a pallet, so cardboard was needed to line the inside of the boxes to keep the dirt in as pictured above right.


Larry & Max at Miramar Landfill.


So now we needed to fill these boxes.  Because the area that they were being placed was on asphalt, they needed to be fairly tall so that the roots of the plants wouldn't be scorched.  We filled the the bottom half of the boxes with composed hay, left over from the school's 71st annual Halloween Carnival.

As much free compost as you want...Max was in heaven!
The top portion was of each box was filled with FREE compost from our city's landfill.  Basically, they take the green waste collected from households and turn it into compost, which is then offered for free to any resident of San Diego.  Check your city to see what's offered in your area.


Finished Product!


 So our next step was to plant out the boxes.  Since it was nearing the end of the year, we needed items that would grow fast.  I had sprouted some sunflower seeds from raw seeds at Trader Joes.  The only issue is you know you're going to get a sunflower, but not sure what variety...giant or dwarf.  The plus is that you get thousands of seeds for about $1.50 and can eat the rest.

The kids then each got to plant beans, radishes or lettuce, all of which grow pretty fast.  Our local Crown-Ace hardware donated the marigolds and tomato plants.

Cabrillo Elementary School First Grade RRR Garden Area.
Box on the left contains yellow squash, sunflowers & marigolds.
Box on the right contains sunflowers, beans, radishes,
lettuce, tomato,marigolds & pinwheels keep the birds away!


Brianna, Jennifer, Margarita & Miguel.
 As part of the curriculum, the kids made observations on the things they had planted, including drawings!  In the red tub, each kid threw in a hand full of birdseed and made predictions as to what would grow.  We got predictions on everything from a peach tree to watermelon...lol!  The green pots are potatoes, which grow green plants very quickly.

Overall, the RRR Garden Project at Cabrillo Elementary was a success.  The kids have a better understanding of where food comes from and the classes next year are set up to do the same.  On the last day of school, each kid got to take home a plant from the garden.  They were so proud of their accomplishments..."I grew this!"


Brandon & Reggie watering the garden &
making observations in their Science notebooks.

Monday, April 23, 2012

Globe Quilt~A Generational Experience

I've only been sewing about a year, so I'm really not that good yet.  This quilt, however was a lot of fun to make and not too difficult for me.  It also has a story.

When I was a young girl, my grandmother, Dorsey, made me a denim shirt and embroidered flowers, birds and strawberries on it...exquisite work. My grandmother was an amazing woman and so talented in so many different areas.  She was an expert seamstress as well as very talented at hand embroidery.  She could garden and cook....really she could do anything she put her mind to.

When I still lived at home with my parents, I remember cleaning out my closet and coming across the 'fancyshirt' Dorsey had lovingly made for me.  Because I was young, I was going to to give it away.  My mother, another wise woman, took it and put it away in her closet.  Many, many years later, I came across it on a visit to my parent's house.  I asked my mom if she would mind if I took it back.  You see, I had just started sewing and when I saw the blouse I formulated a plan.  I saw a keepsake that I could share with the rest of Dorsey's grandchildren.

My grandmother had seven grandchildren and five of us have children.  Although my grandmother, Dorsey,  lived long enough to meet only one of her great-grandchildren, I want all of them to have a part of her, as well as pass down her love of sewing through me and my work.

My sweet cousin, Crockett is 9 years old and this week he lost his daddy.  It really breaks my heart.  It also makes me realize that if I really want to embark on this journey of leaving a part of Dorsey with the next generation, I need to start now.  Also, when I get bad news, I like to DO something...so I started sewing.  Here is my journey.


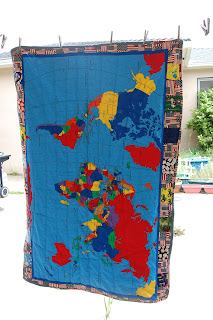
I started with Dorsey's shirt, a world map fabric panel, some boy-themed 'I-Spy' squares, flannel fabric for the quilt back, fabric for the binding.  Supplies used are as pictured.


After I added a flag and I-Spy boarder, I cut some batting and the blue flannel fabric a bit larger than the quilt top.  I then made the 'quilt sandwich' and held it in place using about 20 safety pins.


After I quilted the top following the latitude and longitude lines, I trimmed the quilt (no picture...sorry) and sewed on the binding.  That's me and my 'Hello Kitty' 3/4 size sewing machine.  Having a simple, no frills machine really makes sewing much easier and enjoyable.


So now the fancyshirt has a new life as part of a quilt!  Crockett gets a small strawberry embroidered by Dorsey on a quilt made by his Cousin Marti.  It's a family quilt made by two different generations.

 
Here's the finished project, ready to be boxed up and sent to my sweet cousin!
Hope you enjoyed the journey and look for more of these 'Cousin Quilts' in the future!

Cheers~
Marti in San Diego

Sunday, October 30, 2011

Bloggers Quilt Festival

I-Spy Quilt (Disappearing 9 Patch)


This is the first quilt I ever made.  Actually, it's one of the first things I ever made.  I started sewing not quite a year ago.  My son, Max has pretty short legs, so I bought a sewing machine so I could hem his ridiculously long pants.  So last year around Thanksgiving, I started on this journey.  You see, I really didn't even know how to sew.


By January I thought I was ready to try a quilt.  It actually came out quite well.  It's ironic that such an old fashioned art, like quilting and sewing, could be taught through modern methods.  I watched clip after clip on youtube and read blog after blog on tutorials.  One of my favorite teachers was Jenny at MISSOURI STAR QUILT COMPANY.  Another was Care at OBSESSIVELY STITCHING.  I learned how to thread the machine, sew and then quilt.  There is so much information out there that it made sewing...and making this quilt easy!


I didn't even know enough to buy actual quilting materials.  The quilt back and red sashing is an old red sheet.  The small blue setting squares and boarder are another old chambray sheet.  You can see from this picture that the "batting" I used is actually an old leopard print blanket.  The I-Spy squares mostly came from an I-Spy swap.  That's another great tradition that has gone modern through the internet!  You buy 10 I-Spy fabrics, mail 10 4" squares of each to your host and....Voila!  You have 100 different I-Spy squares to choose from!


I used a TUTORIAL from Care at Obsessively Stitching for a Disappearing 9 Patch Quilt: I-Spy Version.  I used ANOTHER TUTORIAL from Jenny at Missouri Star for the quilt as you go method.  The combination of both of these made my first quilt quick and easy.  Cutting out took a about an hour one day...the subsequent cutting, sewing and putting together took about another 5 hours on another day.  Instead of binding, I just folded the back over and sewed it on. 

I have many more plans for I-Spy quilts just like this one!  I have cut out another boy and 2 girl and versions and just need to put them together.  I'm not sure that using the quilt as you go method is actually easier.  I've made 4 other quilts and I'm still trying to decide.which way works best.  I will say that the disappearing 9 patch method does give you the most bang for your buck!


So here is the finished product and a sleeping kiddo.  I hope you enjoyed my journey from novice to quilter.

Cheers~
Marti

Friday, October 21, 2011

Halloween Placemats

 Don't have Halloween decor at your house?  Why not make yourself some Halloween Place Mats?

Recently I made some of these Halloween Place Mats.  It was super easy...anyone can do it!


You'll need assorted Halloween fabrics, sewing machine, thread, some sort of batting/interfacing.

I had a bunch of Halloween I-Spy squares, so I started with these.


Find a place mat you like the size of to use as a template, then sew together your fabrics.


Once your front is sewn, cut your back to about the same size. Place RIGHT sides together and sew around 3 1/4 sides.  Now turn inside out, add your batting (I used the stuffing out an old office chair...I'm all about repurposing!) and close your 4th side.  Quilt if you like. 

I quilted one set that I gave my sister and the other set (for baby Cooper and his parents) I just ironed to set the batting in place.

These are super easy and easily add a festive feeling to your house!  Enjoy!!


Cheers~
Marti