Umbrella

Umbrella
Powerscourt, Ireland.

Wednesday, April 27, 2011

Earth Day & Other Activities!

This week I seem to be playing catch up.  Last week was a whirlwind of activity!  Here are the highlights.

On Thursday, I reconnected with a great friend from college!  Dave and I had lost contact over the years, but thanks to Facebook we recently reconnected!  It had been over 20 years, but we picked up right where we left off.  It was so fun to spend time together and introduce him to the important people in my life...Max and Larry.  Max was a little shy, but enjoyed using Dave's camera!

Friday was Earth Day and I was the guest lecturer at Max's Kindergarten.  We covered some ASL (American Sign Language) signs that had to do with growing things....grow, garden, pea, cup, water, sun, etc.  After that we planted some peas in repurposed containers.  I chose peas because Kindergarten students need some immediate feedback and peas sprout quickly. 

Here are the pea seeds planted in the recycled Mandarin Orange cups.  On Tuesday (yesterday) some of the peas had already sprouted!


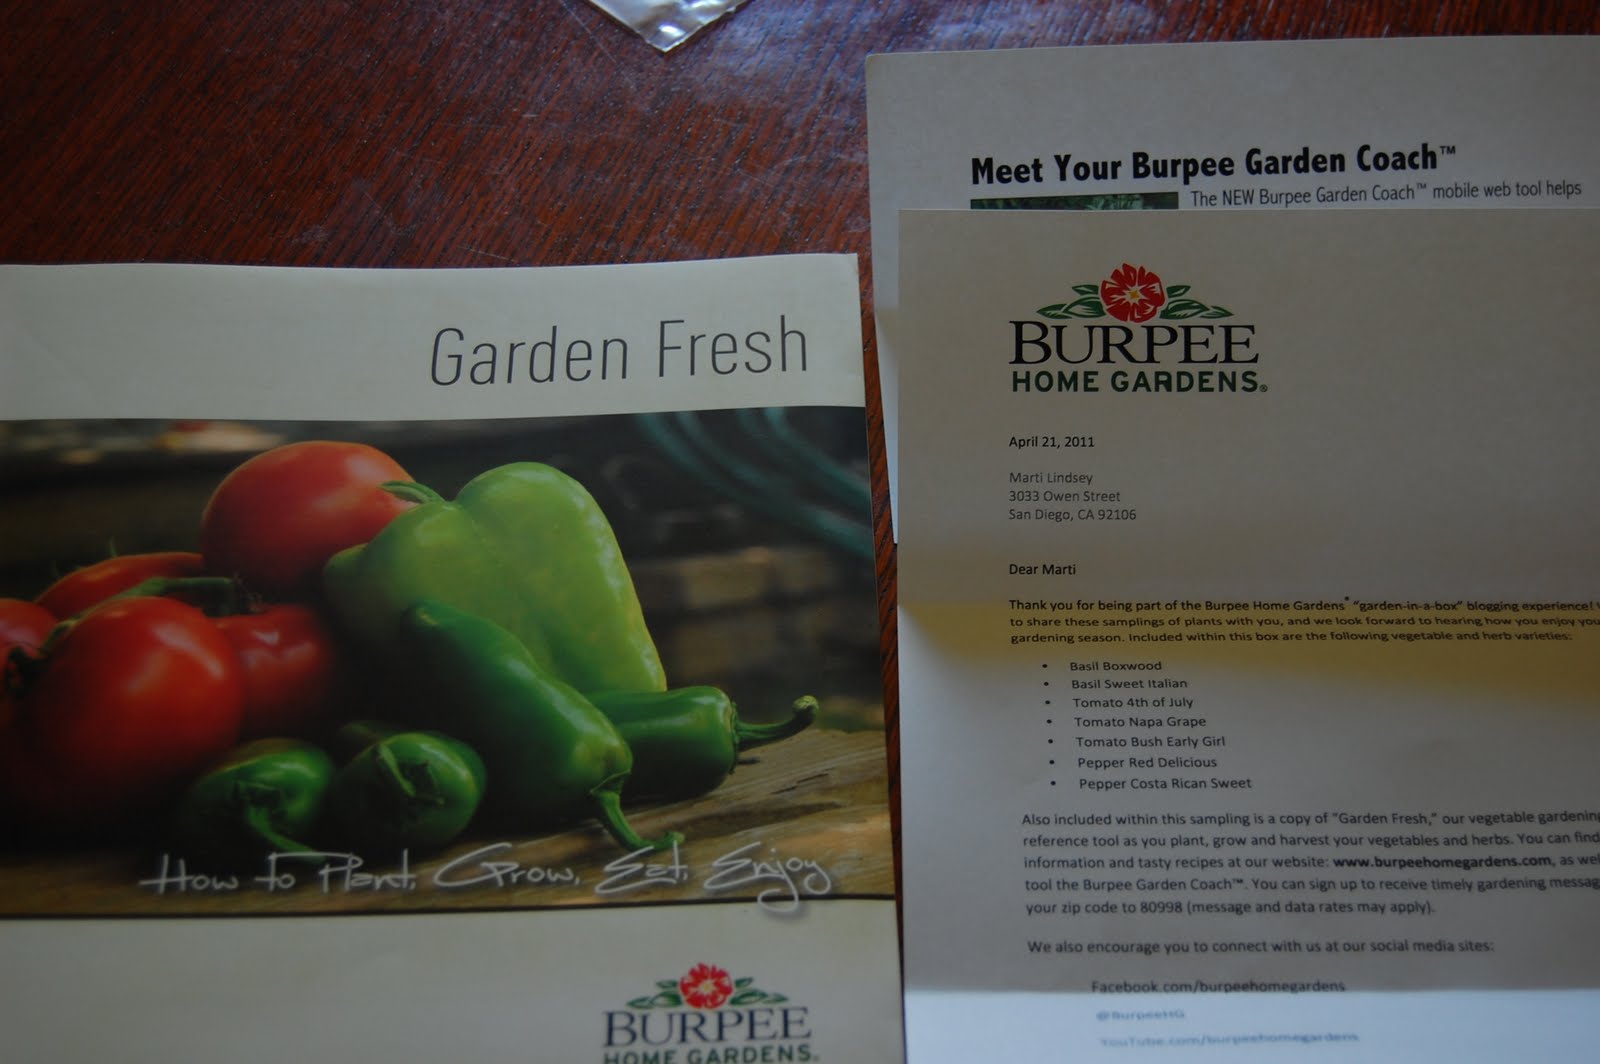
When I returned home from the Kindergarten class, I had a pleasant surprise waiting for me....plants!  I had volunteered to be a tester for Burpee awhile back.  Fed Ex delivered a box of live plants, and on Earth Day.  How fortuitous!


In the box were 2 plants of each:  2 varieties (Red Delicious, Costa Rican Sweet) of pepper, 3 varieties (Napa Grape, 4th of July, Early Girl) of tomato and 2 (Sweet Italian, Boxwood) varieties of basil.  I got right to work.

The plants arrived and were strong and healthy looking.  Typically, I grow heirloom varieties, directly from seed.  The row on the left are my own plants.  The middle and right hand rows are the Burpee tomato plants, which are hybrids.  The peppers and some of the basil are in the sunny spot near the tree trunk. 

Here are the black soy beans starts that I transplanted in the big garden.  These were started from seeds from the Bountiful Gardens catalog.  They have a lot of hard to find seeds and all are heirloom.


Here are some peas, started about a week and a half prior that I transplanted.  Let's see how the tomato ladders work as support for them.


Since my cucumber starts keep getting devoured by the snails, I'm trying something new.  I am covering the area in plastic and spreading diatomaceous earth on the plastic.  The back is a support so these cukes can climb.  So far, my cucumber seedlings remain unmolested by the snails.....yippee!

So hope you enjoyed my gardening updates from last week....stay tuned for more.  Enjoy your week!

Cheers~
Marti

Wednesday, April 20, 2011

Little Bunnies

I wanted to try my hand at sewing something for Easter, for Max and for gifts.  I did a quick internet search and come across Twig & Thistle's Poppy the Easter Bunny.  These looked easy enough, so I gave it a go.  Wow, were they easy and addicting!  So far I've made 10 of them!


This first batch went off in the mail to my nephew, Cooper.  Baby Cooper is 9 months old, so I had to make sure there was nothing that could be harmful.  These are made of a cozy flannel.

So let's get started.  I used this pattern from Twig & Thistle as a jumping off point:  BUNNY


The pattern had 2 bunnies and indicated cutting out a front and a back.  I folded my fabric and placed one  template on the fold.  This way my cutting didn't have to be as accurate and I had a little less sewing to to.


The more of these I made, the more adaptations I made to the pattern.  I made the tails a bit more prominent.  I also added a sewn eye and whiskers to my bunnies.


I made blue boy bunnies and pink girl bunnies.  I used the same template to make a pair of bunnies...a bigger bunny and a smaller bunny. 


So art imitates life.  These fabric bunnies were multiplying, like....well rabbits!  My next batch of bunnies will be made of fabric scraps sewn together in strips. 

I hope you enjoyed this....feel free to ask any questions you might have.  Happy Easter to those of you who celebrate the Holiday!

Cheers~
Marti

BLOG TITLE                                                              Sun Scholars

Monday, April 18, 2011

Spring Placemats

Our family is very conscious of the environment.  We try to reduce, reuse and recycle as much and as often as possible.  With Earth Day right around the corner, I thought I would share an interesting take on repurposing a common household item.

If you're like us, you have a lot of items around the house that are past their usefulness in the original state.  You think, there's got to be something you can do with them, but what?  Larry has a lot of t-shirts that can't be worn any longer and I came up with an interesting way to reuse them.  I used them as the batting for quilted palcemats. 

It's easy!

So for this project, I used repurposed t-shirts and some zippy Spring Fabrics


For this project you'll need:
Fabric for the front (I cut mine 20x14)
Fabric for the back (I had 2 that were one fabric and 2 that were pieced) also 14x20
1-2 pieces for each mat of scrap fabric such as an old t-shirts also 14x20
Seam Binding or Ribbon to finish
Scissors, Rotary Cutter, ruler, thread, sewing machine, iron

Put your placemat fabrics together right sides facing each other.  Now place t-shirt fabric on top of the sandwich, so that the t-shirt fabric is facing the wrong side of one of your fabrics as shown above.  Sew together one of the short sides. 

Now flip your placemat to the right side and press.  You should have a sandwich with your old T-shirts in the middle.  Now we will be working on the right side of the placemat.  Starting in the center and working out, quilt some wavy lines into your placemat. 


When you're done quilting, trim and add seam binding or ribbon to finish.  Now repeat the process for the remaining placemats.  I did four of these, two with solid tops and two with pieced tops.


Now set the table and enjoy your new Spring placemats.  And you can feel good that you reused something that might ordinarily be thrown away. 

I hope these instructions were clear and you enjoyed this tutorial.  Feel free to ask any questions you have.  These really are super easy and really brighten up your table!

Happy Earth Week!

Cheers~
Marti


Dittle Dattle


Saturday, April 16, 2011

Friday Night Sew In Stuff

Although from looking at my pictures, it doesn't seem like I got a lot accomplished, I actually did!


I cut and chain pieced about 200 pieces for a coin quilt I am making.  I'm using a tutorial from Moda bake shop, which actually looks quite easy.  I'm still fiddling with the sashing and border fabrics, but the bulk of the work is done, as shown in this pile.

My limiting factor last night was that I really didn't feel like dragging out the ironing board, so I stopped with the chain piecing.

I then moved on to a placemat project.  I had cut out the fabric last weekend for 4 placemats.  I tried one technique, that did not work the way I wanted it to.  Basically I'm trying to use left over fabric and old t-shirts as the inside batting.  When you sew woven cotton to knit (like t-shirt material) it stretches and puckers....bummer for me.


So I had to embark on a new course with the placemats.  I sewed together one side, quilted the front, t-shirt and back together, trimmed and then added seam binding.  It actually turned out cute.  I started the second placemat (top of photo) and quickly realized that I needed the iron, so I stopped for the night.

So, this is my first Friday Night Sew In.  I really like the idea of setting aside time to do something creative.  Although I just started sewing, I have a lot of projects that I need to work on. 

Cheers~
Marti


Handmade by Heidi

Friday, April 15, 2011

Wednesday, April 13, 2011

Scholastic Book Fair

Ok...kids are hilarious.  They just crack me up.  This week I'm helping at the Scholastic Book Fair at Max's school.  Basically, this means that I answer questions, calculate tax and help kids write down the titles of books they want to come back and purchase later in the week.

We received 10 copies of a biography on Justin Bieber.  It's less than 50 pages, has photos on every other page and costs $3.99 + tax. 


This was the best selling book on the first day of the book fair.  We sold 7 copies!  What was even more hilarious was that I helped no less than 20 kids write down the title and price.  Our librarian had to call scholastic and order additional copies...I hope they arrive in time!

Today was day two.  I was fully expecting to sell out of the Justin Bieber book...we only sold one copy.  I found out something interesting.  Max's school is grades K-4.  Yesterday  was mostly the younger kids and we had full Bieber fever!  Today the older kids came to the book fair.  The class of 4th graders actually boo-ed when we told them we had several copies of the Justin Bieber book left.   So, I learned that grades K-3...Justin Bieber is way cool.  Once kids reach 4th grade....Justin Bieber is not cool at all.

What warmed my heart was to see the true love of reading and books.  The kids without money immediately sat down and started reading!  Yes, there were a few kids that just wanted to buy pens, erasers and the mini-pizza-kit.  For the most part, they wanted books. 

The really young kids have no concept of how much things cost...or tax.  Several kids had less than $5, yet kept trying to purchase books costing $9.99.  Sadly, they had to be turned away, yet they'd return with another book, costing as much or more.  A Kindergartner (and friend of Max) walked in the door and immediately muttered, "I never have any money."  Hopefully they can return and purchase the book they really want.

Today, the best selling book was, "Aliens Love Underpants."  There was also a lot of activity around the Star Wars and Lego themed books.  I can't wait to see what is our hot seller tomorrow!


I hope you've enjoyed reading about the ridiculousness of the Scholastic Book Fair at Max's school.
Cheers~
Marti

Sunday, April 10, 2011

In Plain Sight Chili

Long before Jessica Seinfeld came out with her book on "hiding" veggies in different foods, I have been fortifying our meals with extra servings of veggies.  When Larry saw that she had written a book, he said, "Hey, she stole your idea."  I have to say, if I've been doing it for years and several authors have written books about it, it can't be that original...or mine to "steal"  haha!  While her method is to steam and puree veggies, I generally use a grater or just cut them up small.  My recipe for Chili relies on neither....the veggies are just in there...In Plain Sight Chili!

In Plain Sight Chili
1-1.5 pounds ground beef
1 medium onion chopped
2 ribs celery, chopped
½ red pepper, chopped
1 carrot diced or shredded
1 zucchini diced
1 sweet potato diced
1 clove garlic minced
½ red jalapeno minced w/out seeds (optional)
¼ cup red wine
2 cans diced tomatoes (plus 1 can chicken stock or water)
1 can kidney beans or black soy beans
1 can v-8 juice
Scant ¼ cup chili powder
1 tsp cumin
1-2 tbsp brown sugar
Salt & pepper to taste

Brown ground beef (depending on your pan, you may need a little oil) with celery, onion, carrot, red pepper and jalapeno if using.  Once it it’s cooked through, add chili powder, cumin and garlic.  Now in a crock pot or large stock pot add beef mixture, sweet potato, v-8, tomatoes, stock or water, red wine, brown sugar.  Cook on low (crockpot) all day or simmer on the stove for several hours.  About 45 minutes before serving, season with salt and pepper, add diced zucchini and can of beans.

Serve with a little sour cream and shredded cheddar cheese.


So on your next dreary day, why not cook up a batch of In Plain Sight Chili....Enjoy!!!!!
Cheers~
Marti


Thursday, April 7, 2011

Storage Cubes for the Nursery

Max is on Spring Break this week and we are trying to pack in as much fun as possible!  We started by heading up to Hermosa Beach to see Max's newest cousin, baby Cooper.  Cooper is nine months old and he is quite possibly one of the cutest babies I've ever seen.  This little guy also has an amazing personality!

 
Look at this face....wouldn't you want to make him something special?  I have made him a few items with this brown and blue fabric as these are the colors in his nursery.  I had enough left over for some storage cubes for his nursery.


I started by cutting out a piece of fabric the size I wanted the cube to be.  I used this as a template.  It turns out it was about 10 inches by 10 inches.  You can make these however large or small you like.


You'll need:
  • 5 squares of fabric for the outside of the cube--I used brown & Blue decorator's fabric
  • 5 squares of fabric for the inside of the cube--I used brown felt
  • Interfacing to reinforce the outer fabric-optional
  • Ribbon for handles--about 7-8 inches
  • Supplies--scissors, rotary cutter, mat, ruler, sewing machine, thread, pins

Start by sewing the 4 sides together in a row.  Next attach the bottom to each side of the cube.  Then finish the cube by closing the side (brown dot to giraffe) of the cube.  Attach interfacing if using. (I only did 2 sides.)  Attach the handles.
Repeat the process for the interior fabric.  I used brown felt for the lining for its stiffness.


Sew the interior and exterior fabrics together, right sides together.  Attach on three and a half sides, leaving an opening to turn.  Turn the cube right side out, press and top stitch.


And here they are....two fabric storage cubes for baby Cooper's nursery.  These are great for storing diapers, supplies, toys or books.

If I do these again, I think I might use interfacing on all four sides or add some cardboard or cardstock to give the cube some additional stiffness.


I hope you enjoyed this tutorial and feel free to ask if you have questions.  Have a great weekend!
Cheers~
Marti


Sun Scholars
The Girl Creative
Dittle Dattle

Wednesday, April 6, 2011

Roto-tilling and Other Adventures

Since Max is on Spring Break, here's a short update on my gardening adventures.  My seed starts from last week are beginning to sprout! 

The cukes are the fastest out of the gate!  The white pack on the far left is the pickling cukes, which I plan to make both dills and bread & butter pickles with.


 These are some of our potatoes.  I love this leafy green plant, which sometimes will get white flower blooms.  I know these will be ready once the green portion dies off.

Basic potato strategy is to cut off any eyes that are growing on a potato in the kitchen and plant it in a pot.  This way we pretty much have potatoes year round!


 Here are some carrots in a container.  I also have carrots planted in several other areas.  We love the French varieties, which are short and round.  Purple carrots are also a favorite.


This is one of my SFG (Square Foot Gardening) boxes that Larry made out of repurposed boards from Max's play structure.  The snails have decided to munch on my green beans, so I'm outlining the box with diatomaecous earth.  Theoretically the snails will not cross this line....so far, so good.


This isn't quite a before picture (too embarrassing.....weeds were over 2 feet high before I took them down with the weed whacker) of our back vegetable bed.  It's super hard to plant from seed because although it seems flat, we're on a hill and the slope causes all the seeds to wash into the corner.


So here I am roto-tilling the back bed.  I am lucky that I married Larry.  He has a well stocked garage full of useful tools.  We've had this for quite some time.  When I got interested in gardening on a slightly larger scale, there it was...a roto-tiller, just waiting to be used!  This task would be nearly impossible without the tiller.
And here is the result of the roto-tilling efforts!  Although the tiller isn't hard to use, it really takes a toll on your hands and arms.  They are sore several days after I accomplished this clear out. As soon as my seedlings get a bit bigger, I'll move them up here.
So that's the update on my gardening adventures!  Thanks for reading and enjoy the rest of your day!

Cheers~
Marti

Friday, April 1, 2011

Kids Helping Kids Through Shoe Drive

When disaster strikes close to home or around the world, it's hard to explain to your kids what happened or why.  We are bombarded with these images of destruction and the only message we seem to hear is, "Send Money."

I was looking for a way to teach Max (and the other kids) about giving back, but in a way that makes sense to a child.  That's where Soles4Soles comes in.  Soles4Souls is a non profit that takes gently used shoes and gives them directly to those in need.  Kids can understand that something tragic happened to another child, and they can help by donating their old shoes to the children in need.  It's a real and tangible gesture.


Through the Cabrillo Foundation, where I'm a board member, Max's elementary school partnered with Sport Chalet and Soles4Souls to collect shoes for the victims of the earthquake and tsunami in Japan. 


We began our shoe drive on Friday, March 25th.  We encouraged kids to bring in their gently used shoes to help the kids in Japan that were displaced by the tsunami and earthquake.

The ASB officers helped to organize the shoes, make sure the pairs were mated, tied or banded together and then packed to ship.


The kids of Cabrillo Elementary School in Point Loma collected almost 200 pairs of shoes in a week!  We packed them up and brought them over to Sport Chalet on Midway Drive in San Diego so they can be shipped to Soles4Souls and then off to Japan next week!


Although I'm not sure that Max (pictured far left in the chair) completely understands what this is all about, the other kids did.  Joseph (pictured in the white t-shirt) said, "This is fun.  It feels good to do something for those kids."

So those of you with kids, let them know that they can help.  Just find some shoes that still have some use in them and donate to Soles4Souls.  For more information, see http://www.soles4souls.org/.

Cheers~
Marti